October 12, 2023
How to add 301 Redirections in WordPress: An Essential Guide

Introduction
Managing redirections is a critical aspect of website maintenance and search engine optimization (SEO). If not handled properly, redirections can lead to broken links, which negatively impact the user experience and search engine rankings. In WordPress, there are multiple ways to handle redirections efficiently. This article will explore the concept of redirection, various types of redirections, and how to implement them in WordPress.
Understanding Redirection
Redirection in web development refers to the process of forwarding one URL to a different URL. It’s a way to send both users and search engines to a different URL from the one they initially requested, which is particularly helpful when you have deleted or moved a webpage.
Types of Redirections
- 301 Moved Permanently: This is a permanent redirect and is the most commonly used. It tells search engines that the page has moved to a new URL permanently, passing most of the link equity to the new URL.
- 302 Found (HTTP 1.1) / Moved Temporarily (HTTP 1.0): A temporary redirect that does not pass link equity.
- 307 Temporary Redirect (HTTP 1.1 Only): Similar to a 302 but it ensures that the method and the body will not be changed when the redirected request is made.
- 308 Permanent Redirect (HTTP 1.1 Only): This redirect keeps the method and body of the original request intact.
How to Create Redirects in WordPress
How to add a 301 Redirect manually
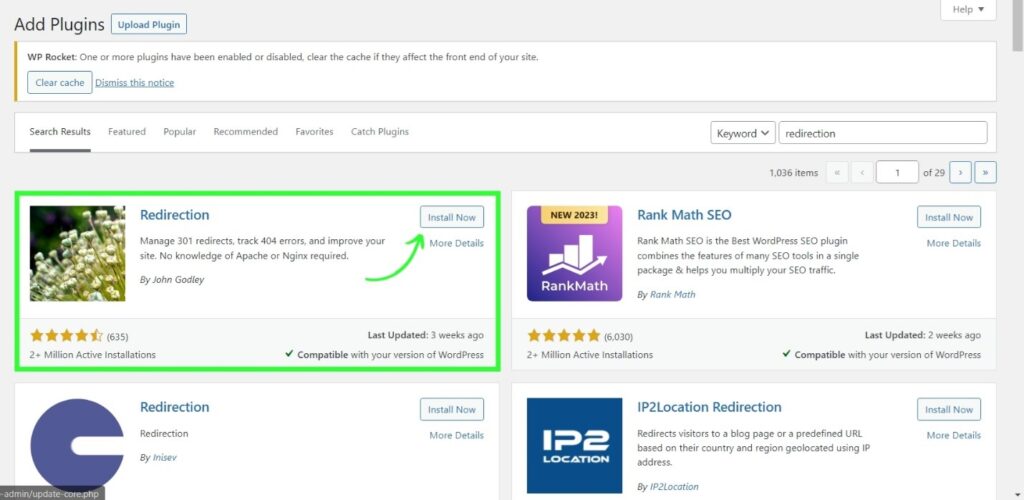
The easiest way to create and manage redirects in WordPress is by using a plugin. Here are some steps to create redirects using the Redirection plugin:
1. Install the Redirection Plugin:
Note: We suggest using the ‘Redirection’ plugin made by John Godley.
– Go to your WordPress Dashboard
– Navigate to ‘Plugins’ > ‘Add New’
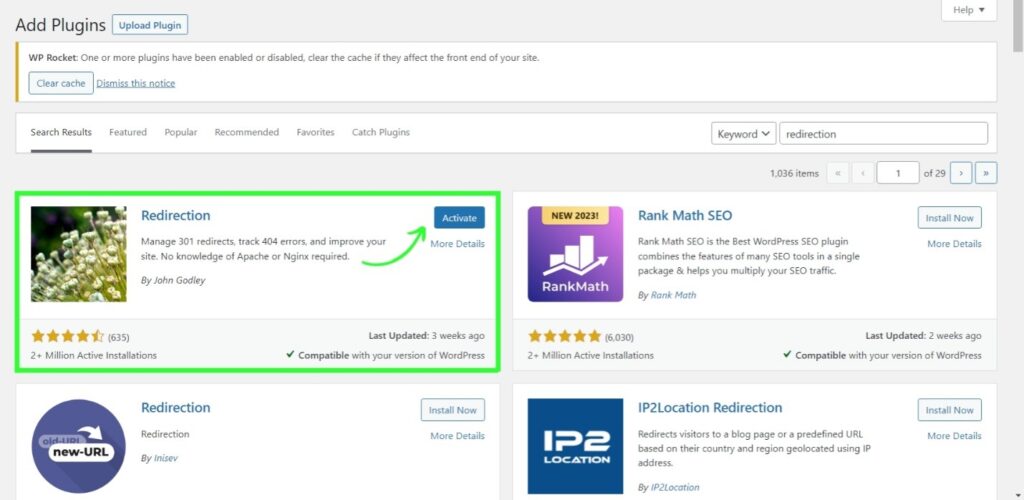
– Search for the Redirection plugin, install, and activate it
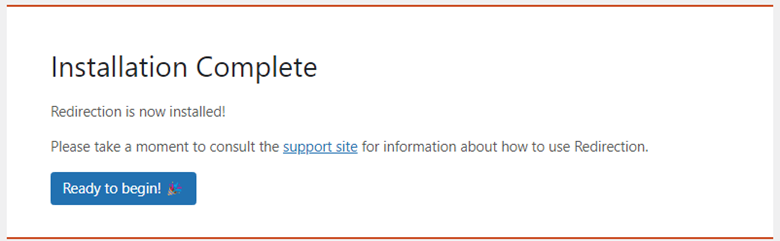
2. Setting Up a Redirect:
– After activation, in the Dashboard go to ‘Tools’ > ‘Redirection’.

– Click on ‘Start Setup’.
– Click on ‘Continue’.
– Click on ‘Continue’ again.
– Click on ‘Finish Setup’.
– Once the setup is complete, click on ‘Ready to Begin’.
– Enter the source URL (the old URL) and the target URL (the new URL).
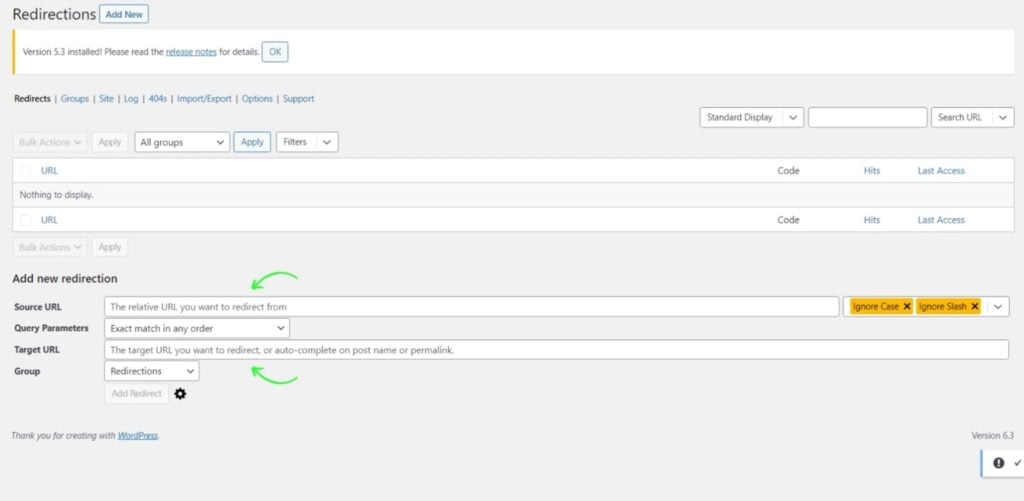
– Click ‘Add Redirect’.
How to add 301 Redirects in bulk
– Create a CSV file with the following columns: source, target, regex, code, type, match, hits, title, status
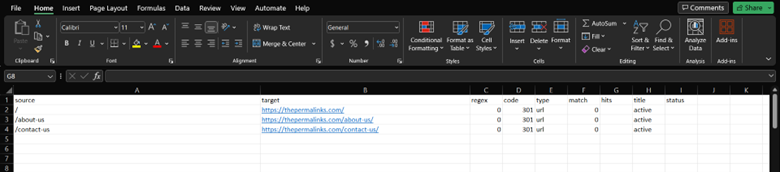
– Add the source URL’s in the source column and the relevant target URL’s in the target column.
– For the regex column add ‘0’.
– For the code column add ‘301’.
– For the type column add ‘URL’.
– For the match column add ‘0’.
– Leave the hits column blank.
– For the title column add ‘active’.
– Leave the status column blank.
– Save the CSV file in any given name. Make sure the file extension says .csv
– Click on ‘Import/Export’.
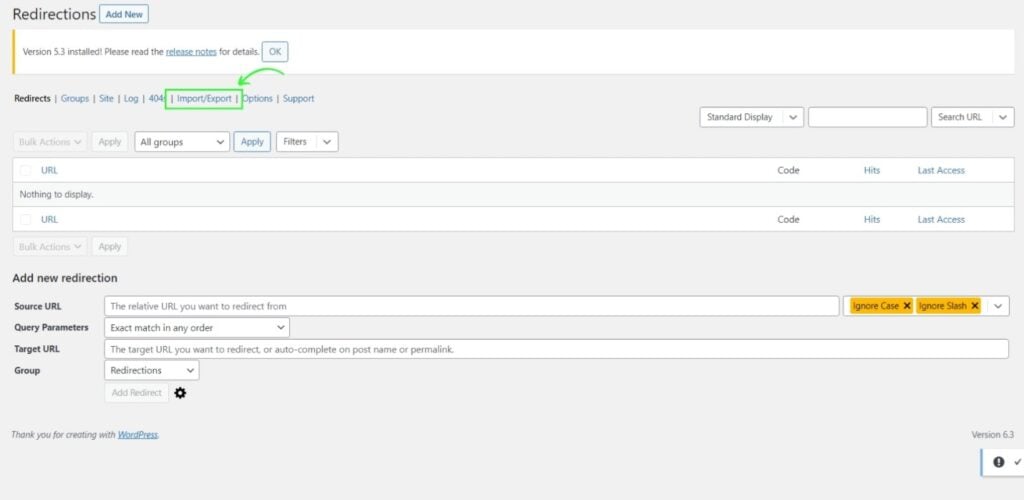
– Click on ‘Add File’.
Conclusion
Understanding and managing redirects effectively is crucial for maintaining the integrity of your website, ensuring optimal user experience, and safeguarding your SEO efforts. Whether through a plugin, .htaccess, or PHP, WordPress offers various methods to implement redirects efficiently and securely. Remember to monitor your redirects regularly and update them as needed to ensure the smooth functioning of your website.